How To Update Old Blog Posts (And Why You Should!)
If you've been blogging for a while, you've probably built up quite a few blog posts on your site. They're just sitting there, having previously done well bringing in traffic but slowly, over time, that traffic has dwindled off. Imagine what would happen to your traffic if you learned how to updated old blog posts & each of those old posts started receiving just 15 new visits per day – if you have 100 old posts that would be 1,500 new views every day!
Today, I'm going to talk about why you should be updating your old posts – spoiler: because you want more traffic – as well as go into lots of detail about exactly how to update old blog posts.
Don't want to read the whole thing? Pin it for later, and enter your info here to instantly download the Free Blog Post Update Checklist:
WHEN TO UPDATE OLD POSTS
If you're a super new blogger, then updating old posts isn't something you need to be worried about. But if your blog has been around for more than 1 year and has at least 100 blog posts, it's probably time to start thinking about how to update your old blog posts.
START WITH POPULAR POSTS
You’ll start updating with these.
MAKE A LIST OF YOUR POPULAR POSTS FROM GOOGLE ANALYTICS
To do this, go into Google Analytics, then to Behavior > Site Content > All Pages. Then, change the dates to be the entire lifetime of your blog.

Now, change the dates at the top right hand to show an entire year.
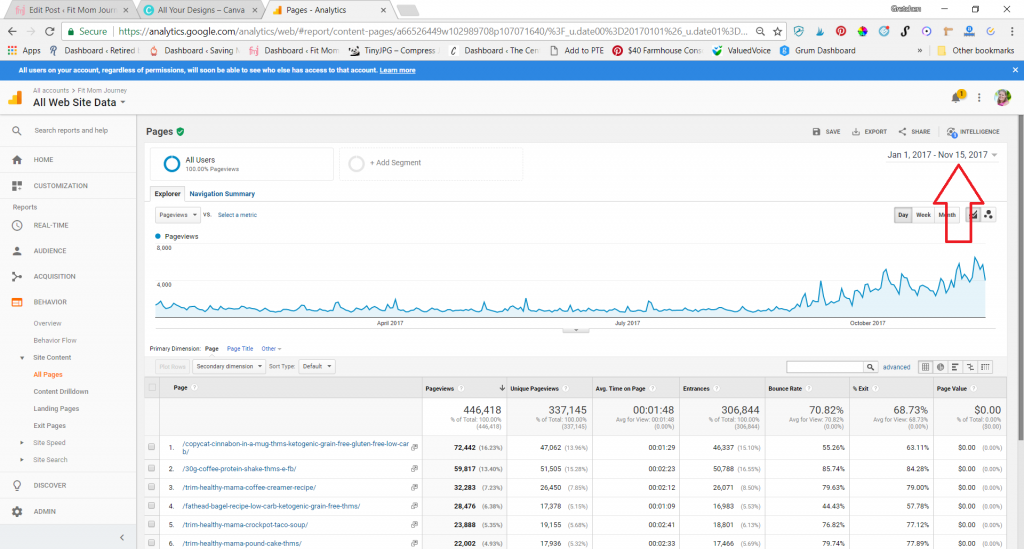
This will only give you the top 10 blog posts, but you will want to see all of them. So, click the “Show Rows” drop down on the bottom right of the page and set it to 5000.
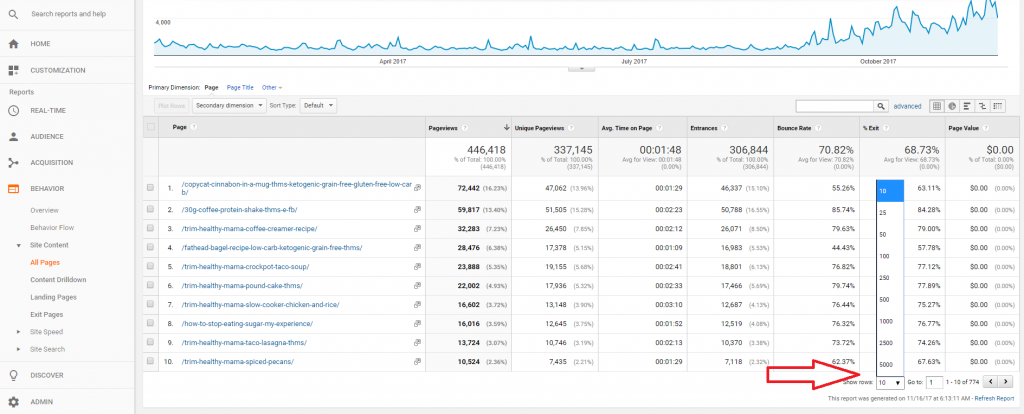
From here, you can choose to export this spreadsheet by clicking “Export” at the top left of the page, and then choosing the file format you are most comfortable with, or you can choose to work with the blog posts from this report on your computer.

Now, you will decide which posts to update. You will update them based on a variety of factors:
- Social Shares
- Organic Traffic
- Time on Page
- Email Conversions
A post can have only one of these criteria (i.e. heavy social sharing) and require updating, or it can have many. Regardless, make sure you are choosing to update the most popular posts under each of these criteria.
How many posts should you update?
My suggestion is to stick with 5 a day until you’ve updated at least half your most popular posts.
Some updates will take 5 minutes, other will take upwards of an hour. Whatever you decide, keep track of which posts have been updated and only do what you have time for.
REVISIT & RETOOL YOUR KEYWORDS TARGETING
Like Google or hate it, this search engine will bring you most of your traffic.
From the start, you should have been trying to target just the right keywords, but as well as know, things with search engines can change quite often.
Here’s how you can revisit your keywords targeting to increase your search engine traffic: (see also, How To Use Jaxxy)
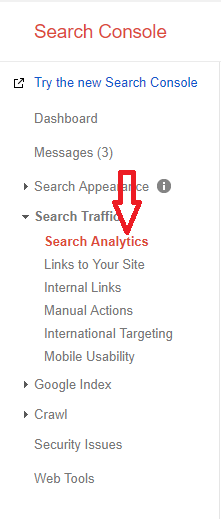
First, visit Google Webmaster Tools > Search Traffic > Search Analytics.
This handy tool will show you your search engine traffic for the last 30 days, plus what terms you rank for on search engines.
At the bottom left of the screen, click the download button. This will open a spreadsheet of all your SEO keywords along with their statistics.
Here, you’re going to sort the data to find keywords that you’re ranking well for, but not specifically targeting.
To filter this way, click the filter arrow that’s beside the column called “Position.” Click “filter by condition” and then choose “is between” from the dropdown menu.
You’re looking for posts that you rank well for, even though you’re not targeting them. I’ve had you exclude posts that you already rank #1 or #2 for, because even if you weren’t aiming for that keywords, you’re ranking very well, so there’s really no point in optimizing more.
So, you’ll set your parameters to #3 on the high end and #15-#20 on the low end.
These are the posts that have a lot of potential for additional optimization.
Next, put one more filter on the data.
Click the arrow next to “Impressions” and click “filter by condition” again. Choose “Greater than” from the dropdown this time.
This filter shows you how many people are searching for each term.
You only want to target keywords who enough people are searching for (about 200) AND that have the potential for additional keyword optimization.
You should now have a list of keywords that have a lot of potential.
From here, there are 2 things that you can do to make your keywords optimization better:
1.On Page SEO
Make sure that the keyword appears in the:
- Title
- URL
- SEO Title (using Yoast)
- Meta Description (using Yoast)
- H1 Headings
- H2 Headings
- Sprinkled naturally throughout the content.
Title & URL
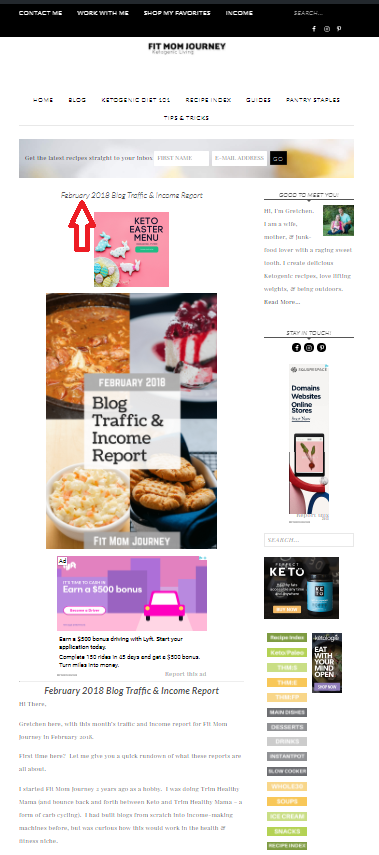
Your title appears at the top of your blog post from a reading standpoint.
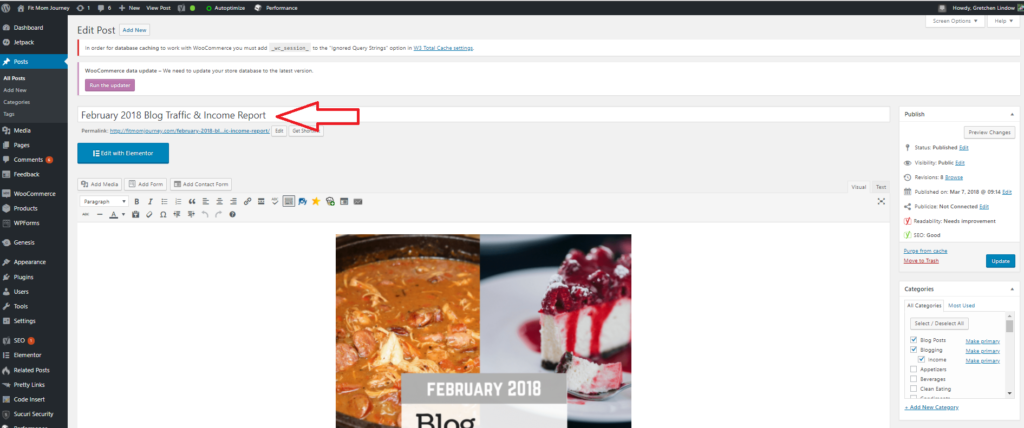
When you wrote your post, you also put it at the top.
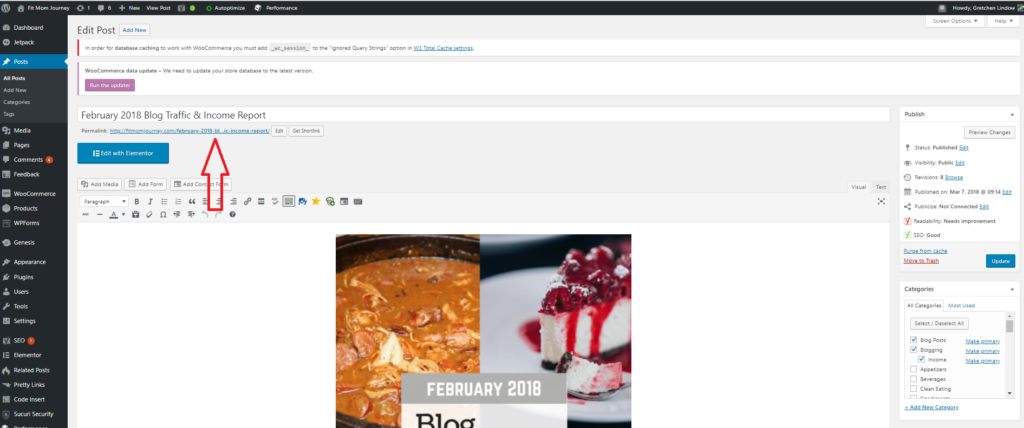
If the keywords doesn’t appear in your title, you can change it. However, before you do so you have to consider that it probably doesn’t appear in your URL either.
Most URL’s are created from the title you put in WordPress.
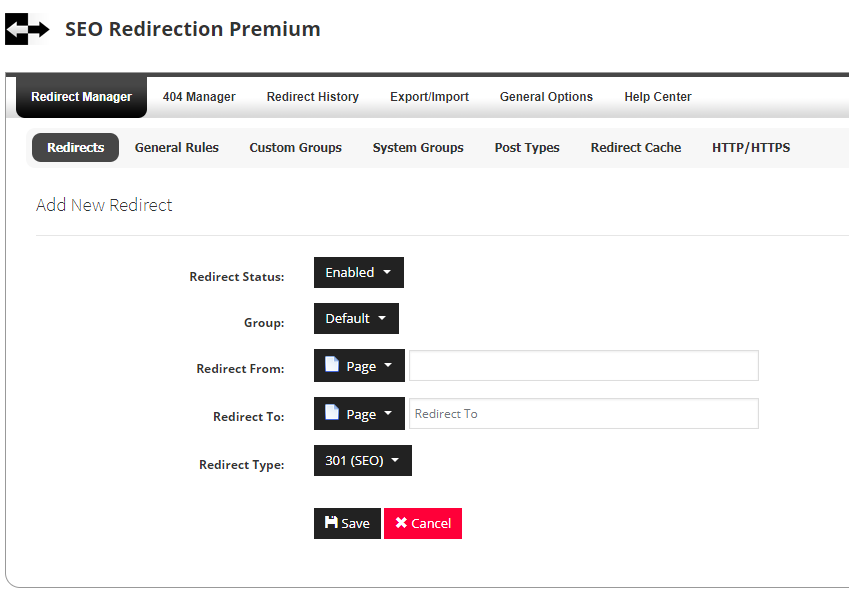
To change your title and URL to include your new keyword targeting, first write down your old URL. Then update it, and set up a redirect from the old URL to the new one. This will keep existing links on social media from falling into a “404 error.” I use the SEO Redirection Premium Plugin, and it makes it very easy to setup redirects from old to new (SEO-optimized) URLs.
2. SEO TItle & Meta Description
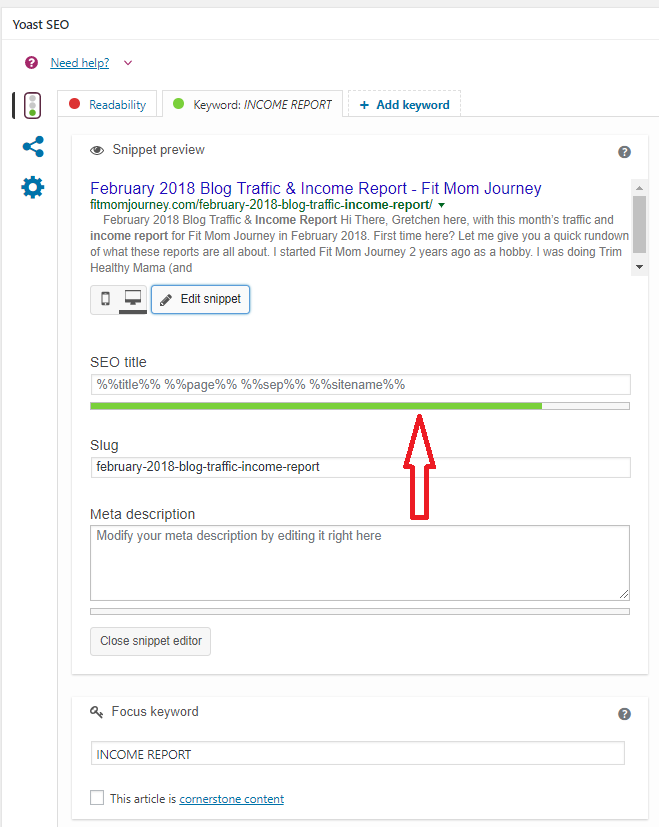
Your SEO Title can be updated at the bottom of your post using the Yoast plugin. (note: there is a free version and a paid version of Yoast. I've always just used the free plugin, but you can read about the benefits of using the paid version here)
If necessary, change your SEO title to include the query you’re targeting.
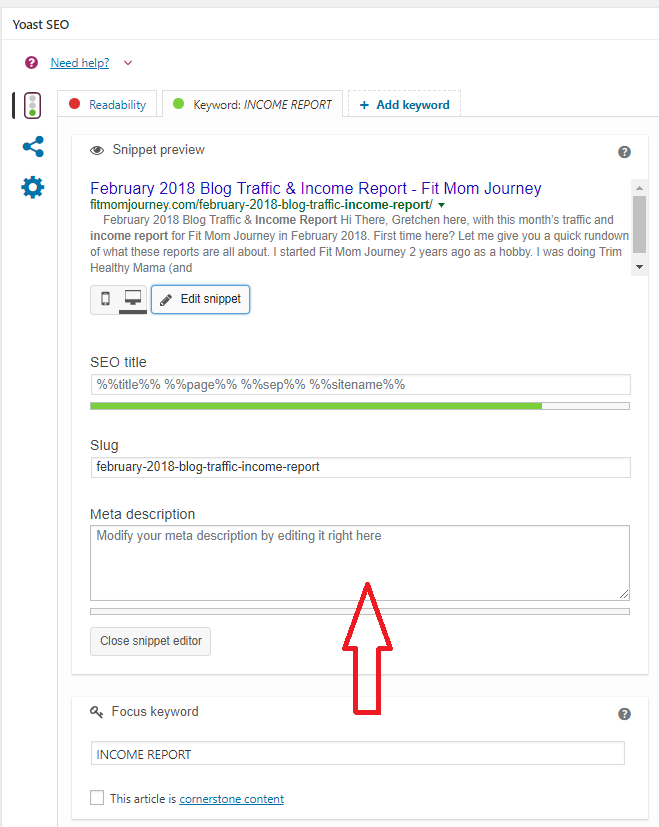
Below the SEO Title box is one for Meta Description.
Use this box to craft a description that includes your keyword, and is engaging as well as entertaining.
When you’ve put a long enough description in the Meta Description box, the progress bar below will turn Green.
3.H1 & H2 Headings
Your H1 and H2 headings are some of the most important headings for SEO purposes, because Google crawls them and will frequently use them in abbreviated search results like this:
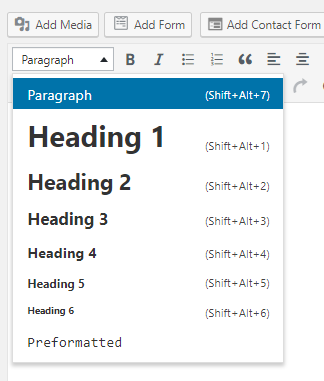
You can find your H1 and H2 designations at the upper left hand side of your WordPress post writing screen, in the “Paragraph” dropdown.
H1 Headings are your main headings, while H2 heading are subh-headings of H1’s.
Sprinkle your keyword naturally throughout your H1 and H2 headings for better SEO results.
4.Throughout Content
To achieve the best possible SEO result, check your content for keyword usage. The keyword you are targeting should appear frequently, but naturally, throughout your content.
If it doesn’t make the appropriate changes to make the keyword more prevalent.
UPDATE OUTDATED INFORMATION
Within a post, check all your links (by clicking them) to make sure that none are broken.
Your affiliate links should be tracking correctly, links to external sites need to be accurate, as well as links to content on your own website.
In addition, read over the article.
Your opinions, as well as factual information, can change over time, and it is important to update that within your blog posts – especially those that you hope to revive.
ADD MORE DETAIL
While you’re updating information, you should be able to find opportunities for more information to be added to the blog post.
Could you add a list of ideas, greater explanation, a tutorial, screenshots, or the science/methodology behind what the article is about?
When you add more detail, you add value to your post.
This helps your reader and improves their overall experience.
INTERNAL LINKING
Google loves internal links.
It’s the foundation of good SEO, and you should be doing this.
Internal linking not only helps with your searching rankings, it also helps users find more of your content that interests them.
Basically, it improves their overall experience.
Is linking annoying?
Nope….the user gets to choose whether they will click or not, making the experience a pleasant one.
Overall, it does not impede user experience, it only benefits it, and how Google views your site. Not to mention the fact that it will help increase page views as users click through to other articles that interest them.
Link When Writing Posts
As you write blog posts, you should be linking to relevant content already written and on your site, using keywords naturally in the text.
Even on a site with 100 blog posts, I can always find at least 15 internal linking opportunities, and you should too.
Link When Updating Posts
Make a list of your most popular posts.
These are the resources your users find the most useful, so you should link to them frequently (and not feel bad about it)
These post may very well be on the list you made earlier, while others may not be.
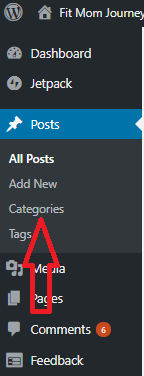
You can also link to Category Pages by going to your WordPress Dashboard > Posts > Categories.
From here you can see all your categories and link to them easily.
Sending visitors to those links will give them an amazing experience on your site.
I would recommend always having at least 20 links in each blog post, at a minimum. You can always do more, just make sure that the links don’t take over.
ADD IN AUTORESPONDER AND OPT-IN INCENTIVE LINKS
There’s a very good chance you already have at least one basic autoresponder set up for new subscribers. You may also have downloadable, helpful content that would work well with some of the content you are updating.
Insert links to your autoresponder forms throughout the article, where they make sense.
And yes, it’s totally ok to have 5-10 of these sprinkled throughout a decent length piece of content + the actual form embedded within the article.
If you don’t have an autoresponder/subscribe incentive setup, do this today!
Generally, it works like this:
Upon subscribing, a welcome email is sent out that tells them things about yourself and your website. It may also include a nice downloadable piece of content. Then, subsequent emails tell them more about your and your business that will help build your relationship with them.
The first few emails you send a new subscriber get the highest open rate, so it’s important to make them count.
First, I’ll send out a welcome email telling you about me, my family, and Fit Mom Journey. At the bottom of this email I link to my most popular articles because these are the ones new subscribers are most likely to enjoy.
You can quickly, easily, and affordably set up a nice-looking autoresponder through ConvertKit. They have a wonderful tutorial which will guide you through the process.
RE-SHARE ON SOCIAL MEDIA
Pinterest:
First things first, when you’re ready to share on social media, you should first make sure you have a pinnable graphic (or three). If this post is truly old, it’s likely that you’ve updated your style and imagery since those beginning days. You probably know that you should use vertical, rather than horizontal images now.
If your image is already updated, but still hasn’t received very many repins, experiment with making 2-3 images for your post with different images and styling, then scheduling those new images to Pinterest over the next 2 months.
Here’s how:
If you’re using Tailwind, this is very easy.
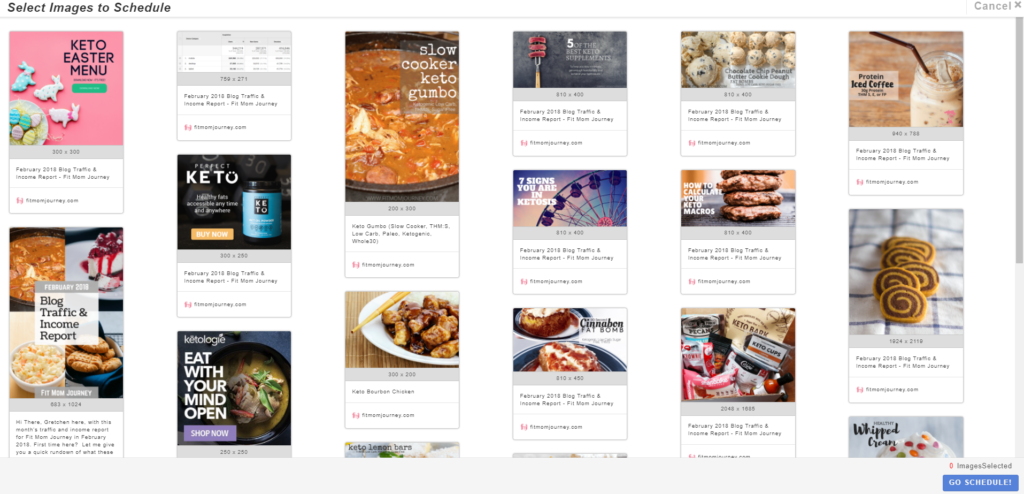
Click the Tailwind extension in your browser.
A window will pop up, allowing you to choose which images to schedule. Click to add them to your queue.
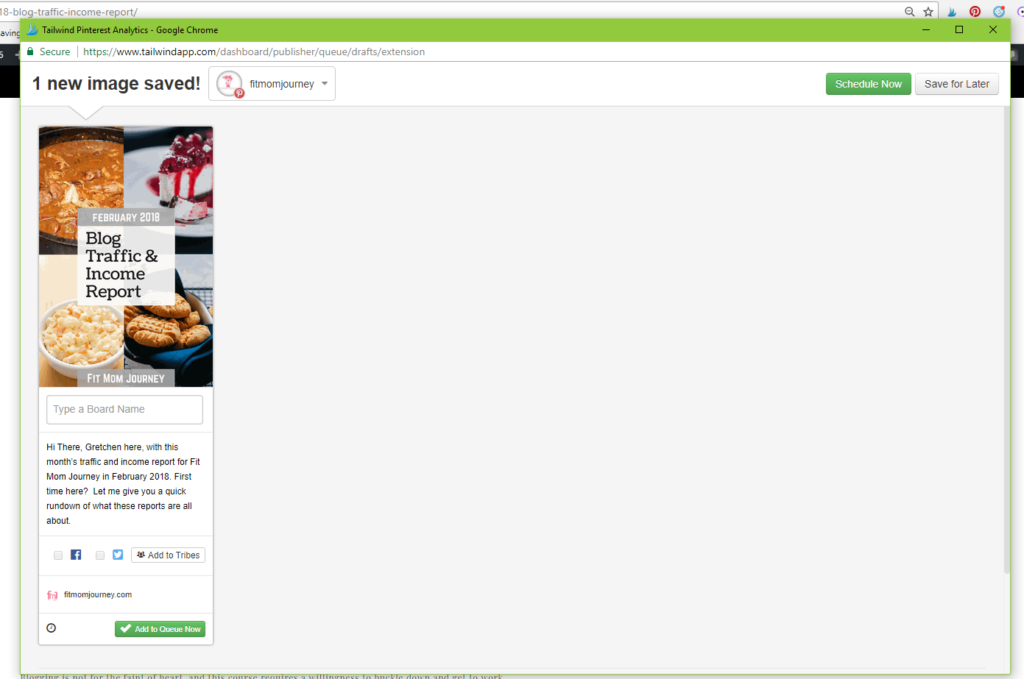
Click Schedule, and another window will pop up. This one allows you to choose boards, timing, and even use Tailwind Tribes.
Craft a compelling description, then add around 10 relevant hashtags. (Yep, Pinterst now does those. Read my full Tailwind Tutorial for more info)
Schedule pins to go out to all relevant boards using the Interval Feature (for more on this visit my full Tailwind tutorial). Schedule them every 4 days, between 8-11pm.
Facebook & Twitter
I use PromoRepublic for my Facebook and Twitter scheduling and I love it. However, no matter what tool you use, this process is going to be basically the same.
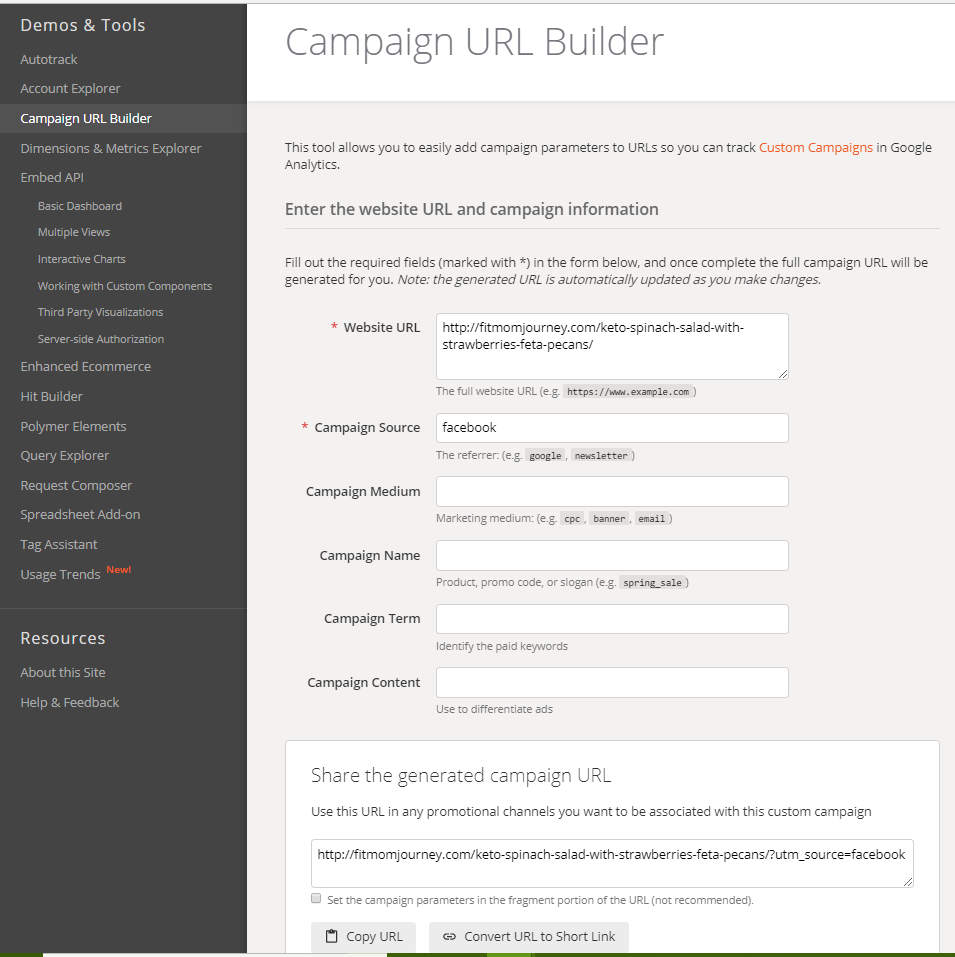
Use the Google UTM URL Generator to create a URL that tells Google Analytics that traffic is coming from Facebook, then shorten it, and it to your post.
Write a short, compelling description, and attach a beautiful photograph that draws people in.
Then schedule it to post the day you re-publish (update) the post, and 1 month after.
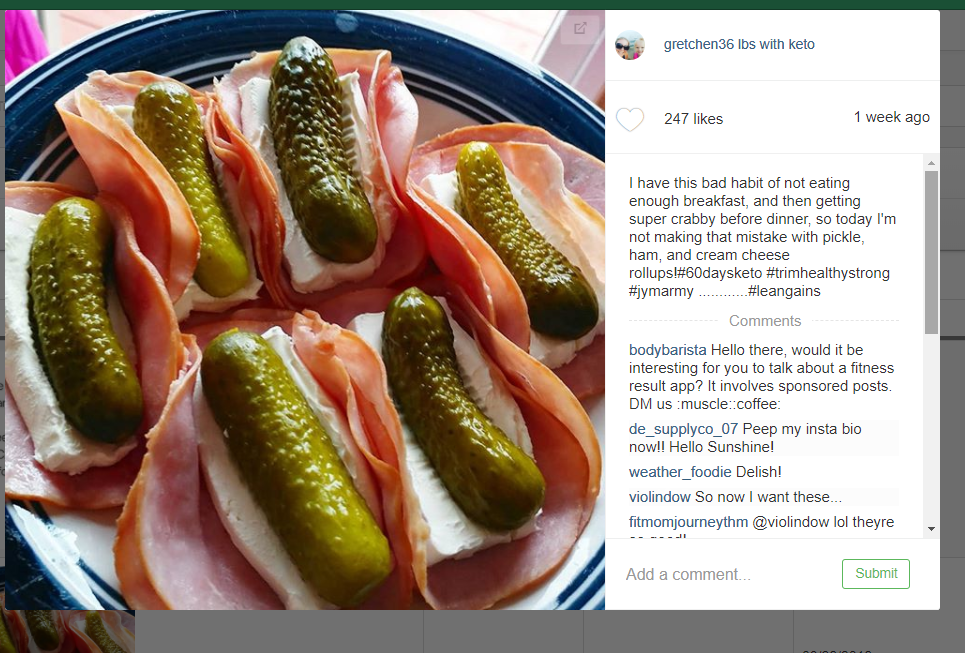
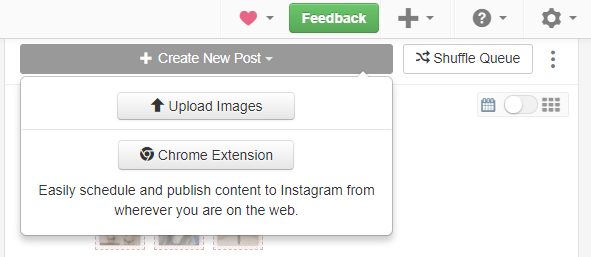
There are a few schedulers for Instagram out there, including my beloved Tailwind. I actually use a combination of Tailwind and Grum, but for this example I will be using Tailwind.
Instagram posts do best when they are accompanied by my candid photography + a longer description.
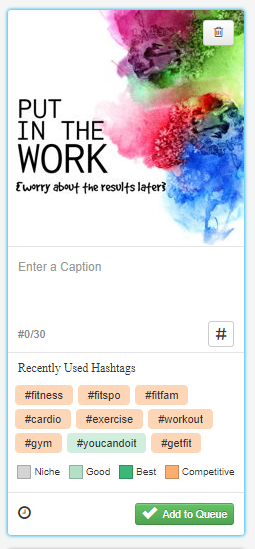
Upload the images you want to share to the scheduler.
Craft descriptions that are entertaining, longer form, and include relevant hashtags using Tailwind Hashtag Finder.
Google+
Google LOVES it when you share your posts on Google+, even if you don’t have much traction there.
To share in the most impactful way, place asterisks around your title to make it bold.
Then add in a nice description, 2-3 hashtags, a tall image, and hit publish. This is what is should look like:
THE LAST STEP
Change the publish date and hit update.
That's it!
After you've done all this updating work, actually hitting update is pretty easy, just remember to change the date on the post.
One important note to consider: make sure you permalink structure is set up not to change with updates.
For example, some permalinks include the date. Here is an example:
This date is the date of publish, but if you change the publish date, the permalink may change.
If this is the case, you need to change your permalink structure to only include the original date.
These tips for updating old blog posts are designed to help you increase search engine traffic, but there is so much more you can do with them! You could:
- recirculate them regularly on social media
- email them out to your newsletter
- spruce them up with affiliate links
- add them to a popular posts section
- republish them on your homepage
- use them as a basis for guest posts
- turn them into a free e-book for subscribers (or for new subscribers)
xoxo,
Gretchen
Interested in blogging helps + tips? Sign up for the Fit Mom Journey Blogging newsletter to stay up on the latest blogging info:
This post may contain affiliate links. See my disclosures for more information.









Leave a Reply